Hello November! How to add watercolor texture in Photoshop
Hello November! How to add watercolor texture in Photoshop

Hello friends! This is a short tutorial to show you how to add a texture effect to your graphics. I painted this floral frame myself, scanned it, opened it in Photoshop and added the text inside.
The font I used here is called “Spelling Night”, this is a very elegant font that really doesn’t need any extra embellishment but I just wanted to add a little bit of a texture to create the illusion that the text was hand-painted as well. This is very easy to do, you just need to clip a watercolor texture to the text or any image you want to texturize.
Here is how I did it.
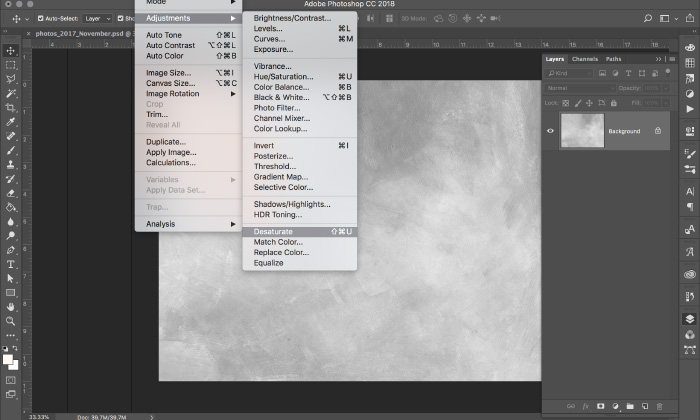
Choose a high resolution texture and open it in Photoshop. Go to Image/Adjustments/Desaturate to remove all color from the texture, this is important in order to keep the original colors unaltered.
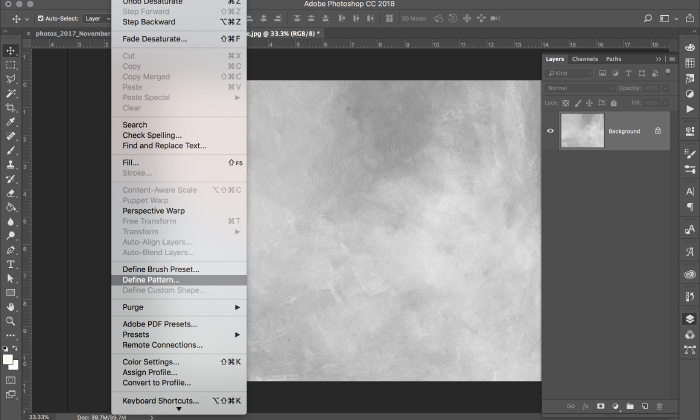
Now, go to Edit/Define Pattern, this will add the texture to the pattern library in Photoshop making it available to use whenever you open the layer styles dialog box in the future.
Double click on the text layer, this will open the layer styles box. Click on the option Pattern Overlay, you will see a thumbnail showing the last pattern you added to the patterns library, click on the thumbnail to select it, this will clip the pattern to the text.
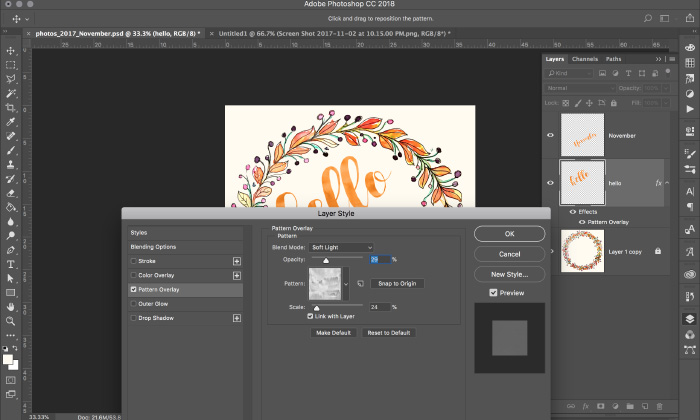
Play around with blending modes and opacity to get the desired effect. For this texture I selected “soft light” for the blending mode and 29% for the opacity. Please note that these settings depend on two things, the brightness of the texture you are using and the original color of the graphic you are texturizing, so this will be a matter of experimentation. Since it is possible to preview how the artwork changes as we apply different settings, finding the perfect recipe is easy and fun!
At this point, I always save the file as “PSD layered file” making sure all the layers are editable and the effects I applied are active. This way I can always come back to this file to recolor or apply different textures. Of course PSD files are super heavy and will take a ton of space, but I’ve never regretted having them available.
After I’ve created my back up PSD file, I just rasterize all the layers (file/scripts/flatten all layer effects) and flatten the artwork (layer/flatten image}.
Thank you for visiting and happy crafting!