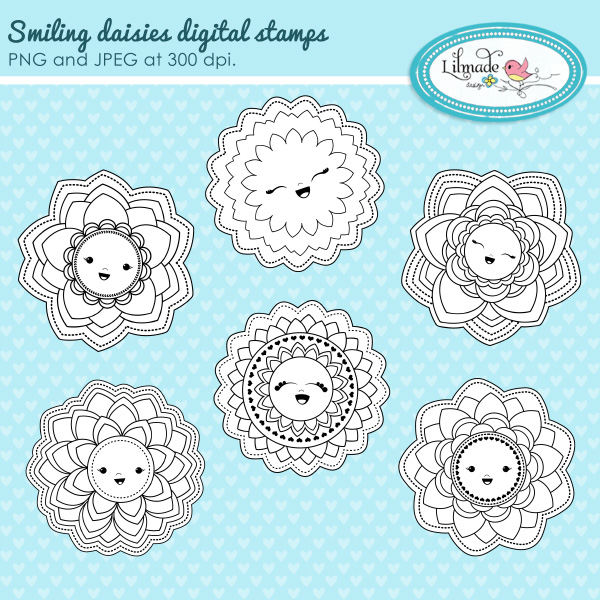
Smiling daisies digital stamps
Smiling daisies digital stamps set comes with six fun floral stamps, kawaii style, featuring hand drawn floral clip arts with smiley faces in the center of the flowers. These stamps are great to create handmade cards, scrapbooking elements and even embroidery designs!
You make my heart smile: the easiest card you’ll ever make!
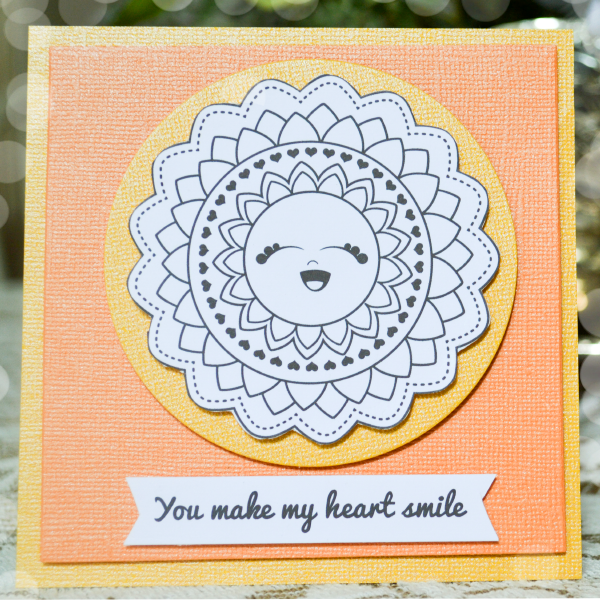
Here is how I made this handmade card:
- Resizing: the digital stamps measure about 6 inches at the widest or tallest point, so if you are going to use them on a handmade card, you will need to load them in Photoshop or Paint shop pro and resize them to a smaller size, in this case I resized the card to a little bit less than 3 inches.
- Writing the sentiment: while I was working in Photoshop I also wrote the sentiment “you make my heart smile” at the bottom of the resized image. The font I used is one of my favorite fonts and it’s called Pacifico.
- Printing: I flattened the image, saved the file with a new name (very important!) and printed out the digital stamp and the sentiment on white Neenah 110 lb cardstock.
- Cutting the stamp and sentiments: I could’ve cut the stamp very accurately with my Silhouette Cameo and the PixScan mat, but because it was only one image I decided to just fuzzy-cut it with a small scissor, you can see it’s not a perfect cut, but it is good enough and It didn’t take long at all! If you have a lot of stamps to cut, then yes, it would be better to use the Cameo to save time.
- Coloring: I decided to go with a colored background so that’s why I used the stamp in black and white, however if you are using a white background you can use Watercolors or Copic Markers to color in the stamp and make it stand out.
- Cutting the backgrounds: to cut the yellow cardstock circle I used my old Cuttlebug and the Sizzix Framelits die set, and for the squares I used the Sizzix Framelites squares. I also wanted to add a sort of frame or mat but I didn’t have a die larger that the one I used to cut the orange square, so I just placed the card on a piece of yellow cardstock and trimmed to fit the card.
- Assembling the card: to give a fun 3D effect, I mounted everything using double sided foam tape.
I hope you’ll find this post helpful!
Happy crafting!!