How to use photo masks or clipping masks in Photoshop
How to use photo masks or clipping masks in Photoshop
Here is a very easy tutorial on how to use photo masks or clipping masks in Photoshop. This tutorial will work in both Photoshop CC, CS and Elements.
A clipping mask, also known as photo mask, is like the digital version of a paper punch, once applied, your photo will take the shape of the clipping mask just like when you are using a punch to cut out flowers or any other shape.
The areas of your photo located on top of the clipping mask will show through, however the areas that go beyond the clipping mask’s boundaries, will not be visible.
If the photo mask has different levels of opacity and texture the picture will also replicate those details giving your photos amazing texture effects as well.
Where to buy clipping masks or photo masks?
You will find the most beautiful photo masks in any digital scrapbooking online store, I also have many available at Lilmade Digitals.
Here is the three steps tutorial
a. First: organize your layers
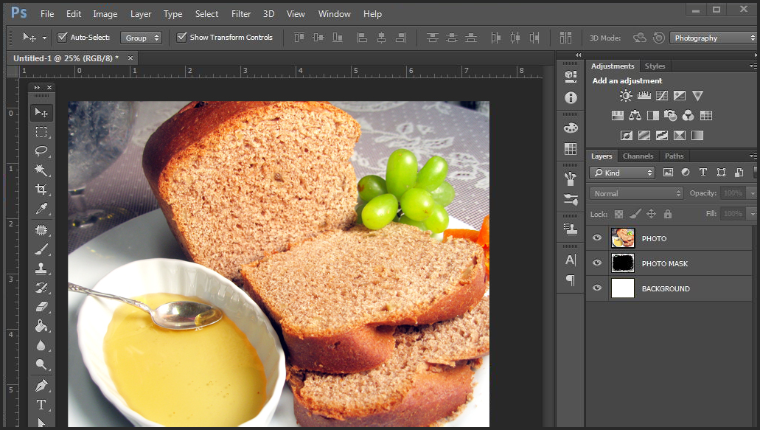
Open the photo mask, then open the paper or picture you want to mask. Make sure the paper or picture layer is above the mask layer. As you can see in the picture below, I have my background layer which is simple a solid white layer, then on the second layer, I have the photo mask shape, and on top of my photo mask I placed the picture I intend to mask. By the way, that’s my delicious home made bread!
b. Clip the mask
Hold down ALT key (OPTION key for MAC users), and position the mouse pointer over the line in between the two layers in the layers panel, and then click.

c. Merge artwork:
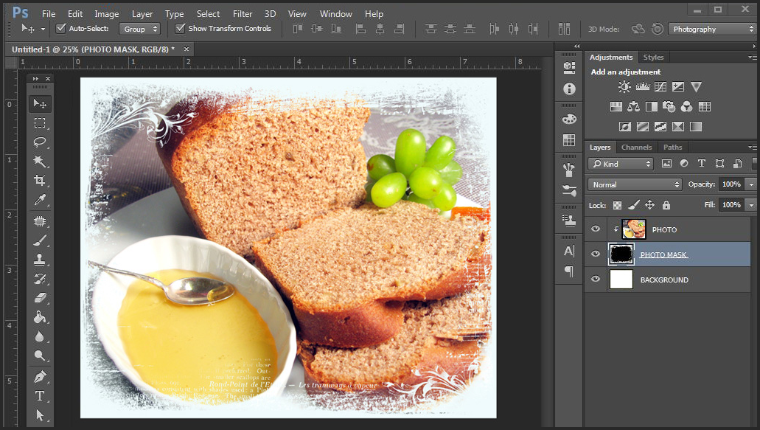
Your mouse pointer will change to a white square indicating you have a clipping mask. Notice how the edges of our picture have changed and you can now see the white background underneath. If you select the picture layer, you can move it around, reposition it and even resize it it. Once you are happy with the result, right click on the photo mask layer and select “Merge clipping mask”.
And you are done, that’s all there is to it!
I hope you found this tutorial useful!
Thanks for looking ♥